
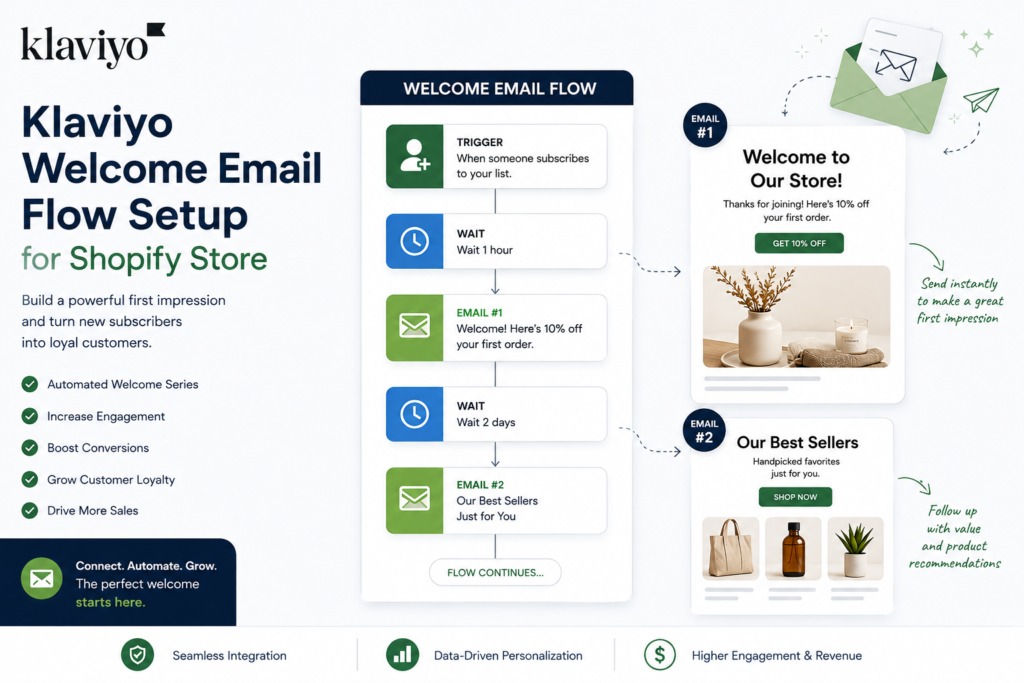
Turning first-time website visitors into loyal, repeat customers is one of the biggest challenges for online brands. You put effort into driving traffic to your store, but without a clear strategy to engage new subscribers, potential sales easily slip away. That is where automated email marketing steps in. Setting up a seamless Klaviyo Welcome Email Flow Setup for Shopify Store allows you to introduce your brand, build trust, and offer timely incentives right when interest is highest. At Shopify Store Manager, we help ecommerce businesses streamline their marketing tools so they can boost conversions effortlessly.
In this guide, we will walk you through setting up a high-converting welcome email flow step by step.
Step 1: Integrate Klaviyo with Your Shopify Store
Before building your email flow, you need to connect your Shopify store with Klaviyo so customer data and sign-ups sync in real time.
Connecting the Accounts
Log into your Klaviyo account, go to the Integrations tab, and select Shopify.
Enter your Shopify store URL and click Connect to Shopify.
Approve permissions and toggle on the Klaviyo App Embed in your Shopify theme settings.
Check the box to Sync your Shopify email subscribers to your main subscriber list.
Once connected, any customer who signs up via a newsletter pop-up or checkout box will automatically enter your welcome flow.
Step 2: Klaviyo Welcome Email Flow Setup for Shopify Store
Now that your integration is active, you can build your automated series. Follow these steps inside the Klaviyo dashboard:
Creating the Automation
Navigate to Flows: Click on the Flows tab on the left sidebar and select Create Flow.
Select a Pre-Built Template: Search for “Welcome Series” in the flow library to use Klaviyo’s proven structure.
Set Your Trigger: Choose your main email list (e.g., “Newsletter Subscribers”) as the trigger. Anyone added to this list will automatically start the flow.
Structuring Your 3-Email Sequence
For best results, space out your messages using time delays:
Email #1 (Sent Immediately): Welcome the subscriber, share your brand’s mission, and deliver any promised discount code or freebie.
Email #2 (Sent 2–3 Days Later): Highlight your brand values, social proof, or customer reviews to build confidence.
Email #3 (Sent 4–5 Days Later): Showcase best-selling products or offer a gentle reminder to use their welcome discount before it expires.
Step 3: Best Practices for High Engagement
To make the most of your automated setup, keep these tips in mind:
Keep Subject Lines Punchy: Use clear, friendly subject lines like “Welcome to the family! Here is 10% off.”
Include Conditional Splits: Add a filter so that customers who make a purchase after Email #1 do not receive aggressive discount reminders in later emails.
Maintain Visual Consistency: Match your email fonts, colors, and logos with your Shopify store design.
Ready to Elevate Your Email Strategy?
Mastering your Klaviyo Welcome Email Flow Setup for Shopify Store is one of the highest-return investments you can make for your ecommerce brand. By automating your first impression, you nurture leads on autopilot and convert casual browsers into lifetime fans.
If you want expert assistance refining your email marketing or managing your storefront, Shopify Store Manager is here to help. Reach out to our team today to optimize your store growth!